For years, I’ve been collecting (hoarding) rubber stamps. I’d come across a pretty flower or cute robot and think to myself, this will come in handy…one day. I’d safely tuck each stamp away into my “stamp drawer”, not wanting to use them or get them dirty until the day that “perfect project” arrived. The problem? The perfect occasion/project never seemed to materialize. So safely stowed they stayed… Fast forward to today, I’ve realized that they make the perfect tabletop activity for my children! What child doesn’t love to rummage through a box of stamps, pick the perfect ink colour, and stamp away!? I’m happy to report that I’ve let go of my hoarding ways and enjoy watching my children give life to these beautiful stamps!
Getting Started:
Search your craft drawers for any rubber stamps you’re willing to let your children experiment with. My advice: Let go! You don’t need to buy anything new, three or four stamps will do the trick!
Look for a variety of materials to stamp on: coloured card stock, envelopes, wood, library cards, newspaper, etc. Putting together a wide variety here, will make only a few stamps go a long way.
When it comes to ink pads, the most important thing, is that they’re not dried up. Let’s be honest, barely visible ink is no fun. If you’re using ink pads found at the bottom of a drawer, be sure to test them out first.

Rubber Stamps

Markers

Ink Pads

Printing Materials
What You’ll Need:
1. Stamps | The majority of my stamps come from Paper Source. They have a really beautiful selection that satisfy a lot of interests! You can take a look at their selection here.
2. Ink Pads | I use ColorBox because they’re so viberant!
3. A collection of materials to print on.
4. Paper for covering your table – Newspaper will do the trick!
5. Markers are great for adding detail and text.
Optional:
6. Embossing Heat Tool and Embossing Powder
What To Do:
There are SO many possibilities when it comes to stamping! I’m going to outline a few of my favourites here, but rest assured, they are just the beginning!
 Give children time to just practice and get acquainted with stamping and ink. Let them layer, in fact, encourage it! Some really beautiful images can be created by overlapping stamps. Giving ample time for children to practice will help them develop a sense of weight and balance needed to achieve clearly stamped images.
 I always present my children with a variety of materials to stamp on. Some of my favourites include: library cards, business card sized paper (in a variety of colours), envelopes, wood veneer, labels, manilla tags, and recycled paper. I love turning stamped artwork into love notes and secret messages! A mini paper bag to tuck a “robot note” into for a friend, or heart covered envelope to hold a love note for Dad, are favourites around here.
Using manilla tags to adorn holiday or birthday gifts lends itself well to stamping, as does sprucing up shipping labels! My family tends to ship a lot of parcels and so I always have a few dozen shipping labels on hand. I create simple labels (pictured below) on Microsoft Word and print them out on full page label paper. We print them out, stamp, and voila! Wherever your children’s stamping takes you, sit back, relax, and watch the creative magic lead the way!
Tips:
Letting go doesn’t mean ruining your ink pads! In order to keep your pinks, pink and your blues, blue…I suggest assigning certain stamps to certain colours. Have a little container for each set, so that children can keep all the stamps for the different ink pads grouped together. Let your children help you decide which stamps will go with which colours!
ColorBox ink pads are beautifully vibrant, however they tend to take several days to completely dry. If you’re using colour box ink, I suggest using a heat tool and embossing powder to quickly set the ink. (This is definitely an adult task, as the heating tool gets very hot.) There are other inks which dry almost instantly, but I find them less vibrant. Craft Smart is a great brand and can be found at Michaels.
Rubber stamp cleaner can be found online and at craft stores, such as Michaels. I simply use warm water and dab with a paper towel. This technique has worked well for me, but I’m always certain to clean my stamps immediately after use. The longer you wait, the harder they are to clean.
If you’re using embossing powder for the first time, USE CLEAR. It is by far the most forgiving! Once you’ve mastered getting every excess piece of powder off your paper, try out some other colours!
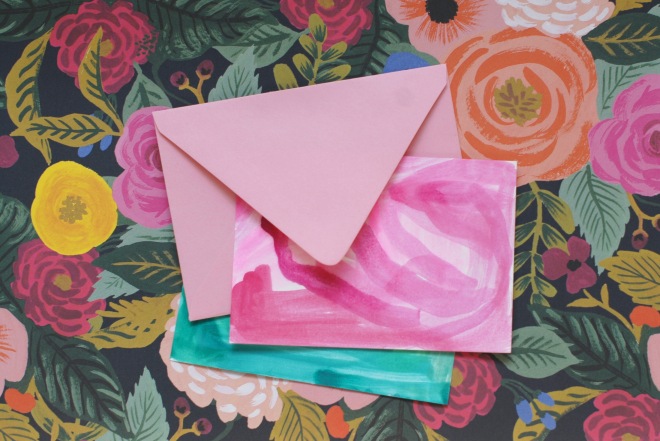
 At our house, we try to teach our sons about being grateful. Grateful for evenings spent at the park, time with grandparents, and yes, gifts too. So after celebrating my son’s third birthday, I got to thinking, “How can my son give thanks?”. Instead of Mommy and Daddy doing all the thanking, I asked my son to make his own thank you cards! I kept it nice and simple. I bit of paper, a little paint, and no overthinking!
 In terms for prep, this tabletop activity keeps it nice and simple! Start by cutting down your paper to fit your envelopes. I use a paper cutter, but scissors will certainly do the trick! Set out a large jar of water, the brushes and open up those water colour paints!